Oct 25, 2007 (cont.)


I took the weights off of the guitar, and I discovered that a few of the edges were not glued down properly.  I assume that I did not get glue to all of them, because some of them were properly glue down.  So I used a toothpick to get some glue in there, a bit of wax paper over the veneer, and the bags of lead shot again.  Now, I will just leave it be, overnight.

This is how I do my spot gluing/veneering.  Also, one of my bags of shot has sprung a bit of a leak.  I think that I will get some cheap pillow cases and put the shot in there.


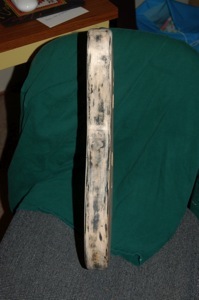
This is what I had left over after I cut the body shaped piece out from the center.


After the has set, but before I have started trimming the edges of the veneer.  What I will end up with the bare edges of the maple exposed on the top side.  Then I have to feather sand the veneer so that it is not so obvious.


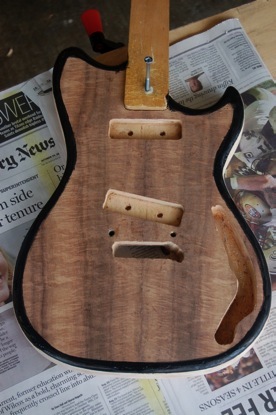
I used a x-acto knife to trim the inside of the holes for the pups, neck, and trem.  The edges are still untrimmed.  Again, I used the x-acto knife for that.  I also knocked a few bits of veneer loose, which I glued back down.


Looking good right?  I have feathered the edges, trimmed all of the internal holes.  It is ready to go, right?  Wrong.  Can you guess what I have forgotten to cut out?


I forgot the holes for the Trem mounts.  But, I remembered in time.


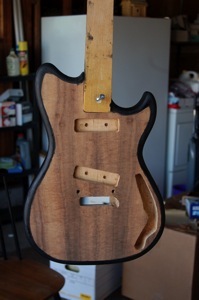
The edge of the black burst effect.  I expect that it will take a few applications of stain to accomplish my desired goal.  This is round one.  And in the photo below, you can see that I have taken care of the trem holes.


A few things to remember when dealing with a dye or stain or like this.  1) Wear gloves unless you want your hands to stain black.  This stuff will stick to your skin, and for quite a few days.  2) You will need a way of holding the body that won’t xfer stain from your gloves to the parts of the body you DON’T want stained.  In this case, I have a neck stub that I use.  In case you are wondering, a Tele neck fits this SC body quite well.  Of course, I don’t know if a Tele neck is the correct scale.  3) When moving the staining towel around, be sure not drip on the body.  I have made that mistake before, but not on this body.


The next few days will be dedicated to staining and finishing.


Nov. 2, 2007


When the stain had dried, I was not happy with the results, so I sanded it all off and started again, only this time with a stain that I had mixed.


I kind of, almost, liked it.  Kind of a distressed, vintage-y look.  But no.  I mixed my own black stain and started over.

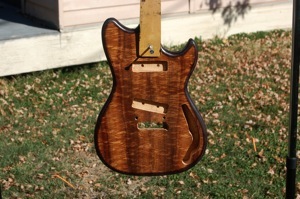
I am much happier with these results.  The coverage is smoother, though perhaps not quite so opaque.  Not as blotchy either.  I think that the stain I was using was designed for more porous woods, such as Mahogany, where I have used it before.


I don’t think that maple absorbs the stain the same way.

And I started shooting nitro today.  I use a California paint booth.  And I use a respirator.  And the back of that guitar body is black, not purple. Between the light and the color black and my camera, the color is not quite correct.

I will sand & finish coating next week, weather permitting.


Nov 6, 2007


I started spraying the next coat today, and I noticed that there were some bubbles forming on the surface of the finish.  I suspect that, since the can was getting towards empty, that it was coming from the newest application.  So I stopped spraying and I will start anew tomorrow with a new can of nitro.


Nov 7, 2007


I sanded out the bubbles and started spraying again, and this time I have started a run.  So I stopped again.  I will sand it out tomorrow, and start spraying again.


Nov 12, 2007


I applied the last coat of nitro today.  Now the guitar has to sit & dry for at least 2 weeks.  So that means that I won’t be doing any more work on this guitar until after T’day. 


Nov. 27, 2007


After letting this critter sit for a few weeks, I have finally started putting it together.  I am missing exactly one (1) part.  A set of screws and springs to mount the pickups.  That’s it.  But the neck is on, the bridge is in, and it is all straight.  I will need to replace the saddles eventually, as the height adjustment screws are stripped.  But that is a minor issue, all considered.


Next page